How To Heat Press A Hat? With and Without Attachments
Do you want to customize your hat? Do you want to put your favorite design on your cap?
Well, it is not a difficult task anymore.
All you need is a good heat press machine to add text, logos, pictures, or your favorite designs.
Did you know that heat press machines specifically for hats are also available?
Well, you can also use a standard heat press. It’s all up to you.
We will discuss heat pressing hats by using a hat press first. Then we will explain how you can do it with a regular heat press machine.
Let’s do it!
How to heat press a hat with an attachment?
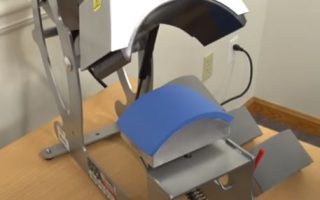
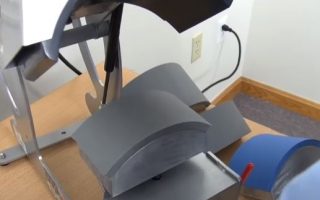
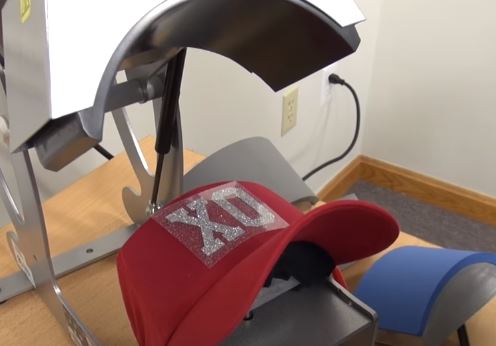
A hat press machine comes with an arm and curved platen design for personalizing the hats perfectly.
OR
You can use a hat press attachment which can be attached to a standard heat press.
Required items
- A Hat
- A hat press machine or attachment
- Heat transfer paper
- Cutting mat
- Scissors or knife (The cutting tool will be a perfect option)
Make your design
You can use graphic design software like Adobe Illustrator or Canva to create a design of your choice. However, you will need to make sure that you come up with the perfect measurements for the design.
A vinyl cutting machine is a perfect option to prepare and cut the design, as most machines will automatically take care of the measurements.
Cutting machines like Cricut and Silhouette also come with a free subscription to software like Silhouette Studio and Cricut Design Space.
These are the perfect option for creating or importing masterpieces.
Anyhow, the first step is to prepare your design.
Trim and Weed Your Design
You could skip this step if you used an electronic vinyl cutter. However, if you use HTV paper, you can not skip this step.
Lay your design on a cutting board and cut it using a cutting tool. Weeding is necessary to remove the excessive vinyl.
Now, mirror your design so that the right side appears on your hat.
Set time, temperature, and pressure on your heat press
Turn on the hat press machine and set the temperature, time, and pressure. You can use these guidelines or follow the instructions provided by the manufacturer.
Put the hat and press it
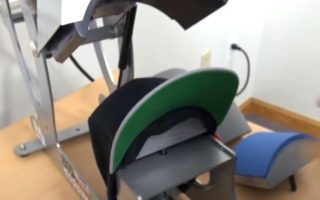
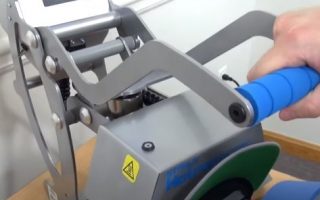
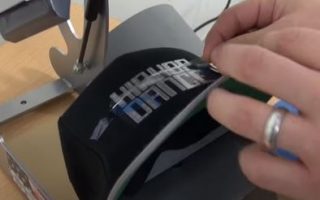
Once everything is ready, put the hat in place and press the platen.
Once it is heat pressed, you will be notified through a beep or light blink depending upon the heat press you use.
Remove the carrier sheet, and your hat is ready!


How to heat press a hat without an attachment?
If you don’t have a hat press or your heat press machine does not come with a cap press attachment, here is a step-by-step guide to customize your hats or baseball caps.
Required items
- A hat
- A regular heat press machine
- HTV
- Teflon sheet
- Oven mittens
Prepare your design
You can follow the steps mentioned in the previous section to prepare your design.
Cut and weed it
Use a vinyl cutting machine or cutting tool to cut and weed the design.
Put the design on your hat
Set up the design and position it on your hat. You can use thermal tape for this purpose.
Get your heat press ready
Line the heating panel with a Teflon sheet before printing on the heat press machine. In addition to protecting your hat from getting burned, this step helps keep it from sticking to the heating element. As a result, your hat will be damaged, and you will have a tough time cleaning the heating element.
Sep up time, temperature, and pressure according to the given instructions.
Put the hat in heat press and hold it
You need to put the hat on a heat press and hold it. You can use a thick fabric or oven mitten for this purpose.
Alternatively, you can use a good iron for small designs.
Press the design
Once the hat is placed on the heating element, press the vinyl. Hold the hat and make sure that all edges get even heat. Once you are sure that it is done, remove that cap.
FAQs
What is the lifespan of heat press hats?
Hats pressed from heat transfer vinyl can be washed up to 50 times. However, It all depends on how you clean the hat.
You can extend the lifespan of your heat press hat by washing it at least 24 hours after applying the design.
To keep your print in good condition, avoid using harsh detergents and dry them instead with the air dry method.
How to put letter on a hat with a clamshell heat press?
- Place the hat on the heat press properly, with the letter centered on the hat.
- Select the “HAT” option from the menu and place it on the heat press.
- Select “Normal” from the “Setting” option and set the temperature.
- Press the “Start” button to begin the process.
How to add the hat attachment to a heat press?
To attach a hat to a heat press, you will need to swap out the attachments of your heat press. Start by unscrewing the other attachments, then slide the top platen forward and lift it up. Remove the heating cord from the top platen and take off the bottom platen using the wing nuts. Attach the hat press piece to the bottom platen and reattach it to the top platen. Finally, plug in the press and wait for it to warm up.
Can you put vinyl on hats?
Yes, you can put vinyl on hats using Heat Transfer Vinyl (HTV). HTV on hats is a creative way to design hats with personalized images, logos, or patches using a heat press. Hats are a popular fashion accessory that anyone can wear, making them a great product option for increasing your HTV printing business sales.
How to use a hat heat press?
To use a hat heat press, start by heating up the press and setting the temperature and time. While it’s heating up, heat the lower platen. Then, open the press and place the hat on it with the bill facing up and making sure it’s straight.
Ensure there’s no cardboard or anything causing a bulge. Double-check the bill is out of the way, and use a pre-press to help flatten the hat.
Finally, press down the top platen, wait for the time to end, lift the press and remove the hat.
How to put vinyl on a hat without a hat press?
To put vinyl on a hat without a hat press, you can use a regular heat press. First, you need a hat, a cut and weeded piece of heat transfer vinyl (HTV), heat-resistant tape, and oven mitts.
Add the HTV to the front of the hat using heat-resistant tape to keep it in place. Hold the hat against the top hot platen of the heat press with oven mitts for the recommended application time for the HTV. Rotate the hat to press the sides and the back of the HTV onto the hat.
Use heat-resistant tape to peel off the transfer sheet. Concentrate on areas that need more pressure and give a final press to ensure the HTV sticks well to the hat.

I’ve been in the printing business for 25 years. I love to share my experiences and knowledge.

